If anyone has been meaning to discover their green thumb but feel like they don’t have the set-up. This is a super simple project that my partner and I knocked up in no time and really cheaply. My raised beds may not look the most stylish out there but pre-made raised beds online can range from approximately £40-£90. These cost a tiny fraction of that!
Living in Newcastle has some serious perks: cheap rent, groceries within walking distance, great parks on our doorstep, cafes around the corner… but our own outdoor space is something we’ve had to sacrifice.
Our flat has a small front yard and a larger shadier back yard. When we moved in in 2020, the front was some dilapidated concrete and the back was some slightly nicer concrete. Not a lot of green for a girl who likes green!
Undeterred, I gravelled over the front yard and arranged some container plants to spruce it up a little. Over winter though, I started making plans. I’ve been wanting to grow my own vegetables for a long time now and never been in a position to be able to. I consulted the only member of my family who spends any voluntary time in the garden, and luckily for me, my granny spends a lot of time in the garden.
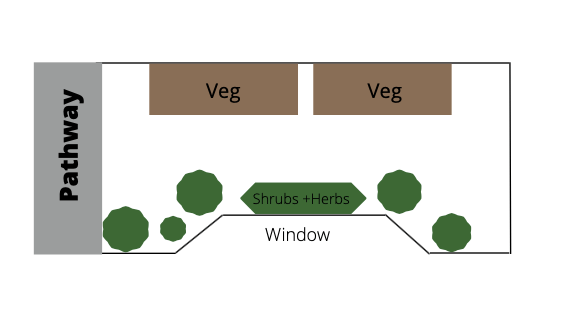
As always with these things, I got out a pen and paper and started drawing. Our walled off ‘garden’, not including pathway, is 2m x 3.7m. And we needed to have enough space to let the dog mooch around and go to the toilet, as well as be able to walk the length space to access all the plants. I decided on two 1m length x 0.5m wide raised containers that would sit along the wall with the most access to the sun.
Fate would have it that my parents decided to replace a large gate of theirs and were more than happy for us to dismantle the old one and re-use the wood. I was really glad we could re-use the old material instead of having to buy new wood.
I’d also been looking on Facebook marketplace where there seemed to be plenty of old pallet wood going cheap or free, so definitely worth looking on there for a greener choice of material!
Luckily the wood we used from the old gate had already been treated and painted for outdoor use, this might be something you have to do yourself if you buy any other wood not intended for being outside.
Assembling the Raised Beds
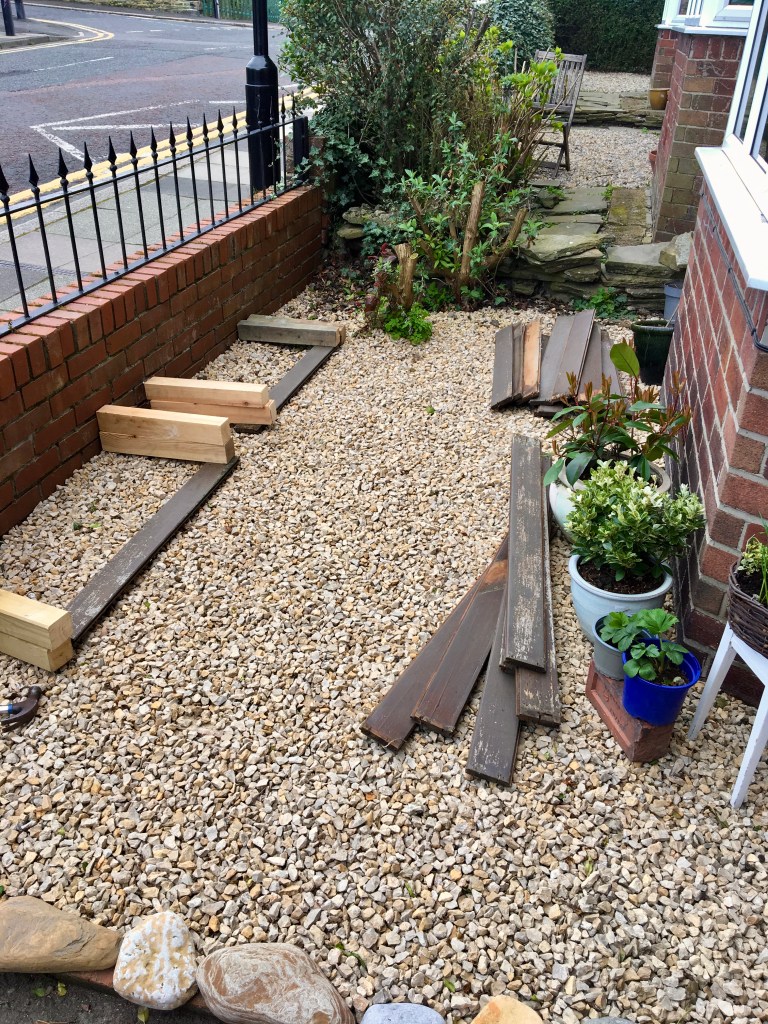
Once we had all our wood, including some spare posts we managed to scavenge from a skip (thank you next-door neighbours for renovating at the same time), we grabbed a drill, some screws and a saw.
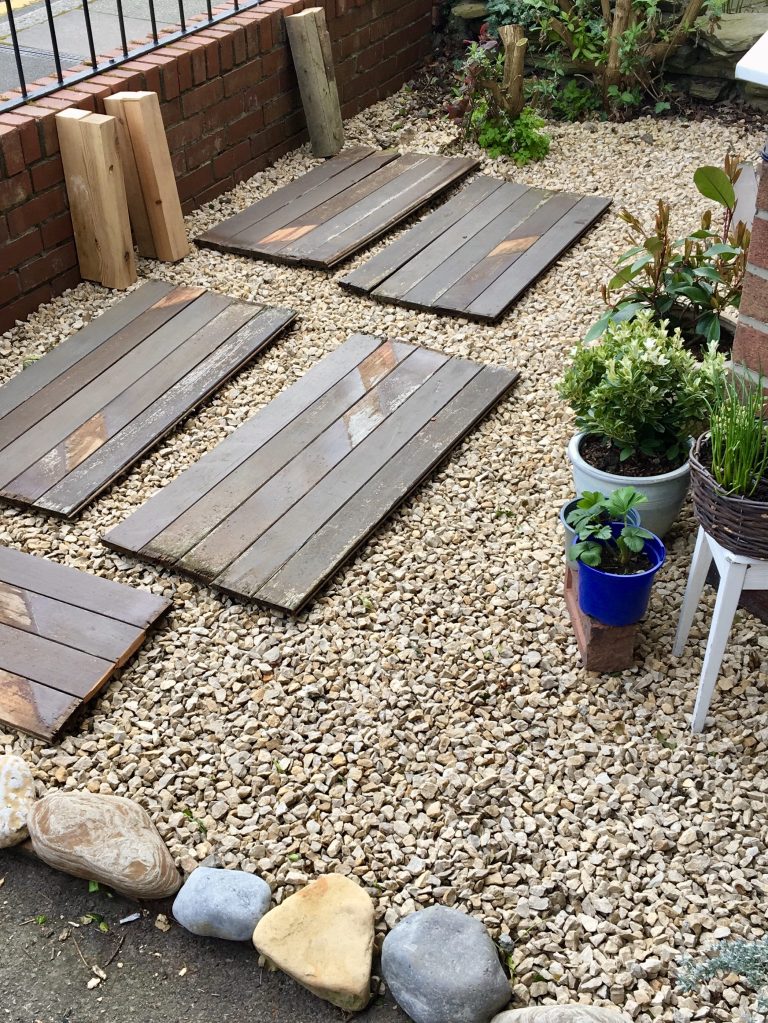
As you can see, all we then did was saw the inner posts to the depth we wanted and use these as the 4 corners, to which we screwed on the planks. The planks were 1m in length so we sawed some in half to make the shorter ends. I made my raised beds quite tall so I don’t have to lean down to water them and so that they wouldn’t get shaded by the wall – but of course anyone can make them any height they like as long as they’re deep enough for rooting.
Ideal Depth
When I’ve researched this, the minimum height seems to be around 30cm but ideally up to approx. 60cm depth for deeper rooting plants such as:
- Beans
- Beets
- Carrots
- Peppers
- Aubergine
- Squash
- Potatoes
However plants that can handle a shallower raised bed (~30cm) include:
- Rocket
- Broccoli
- Onions
- Spinach
- Garlic
- Lettuce
- Radishes
- Cauliflower
- Swiss chard
Plants that often need a depth greater than 60cm include:
- Tomatoes
- Potatoes
- Parsnip
- Pumpkin
- Artichoke
Preparing the Beds
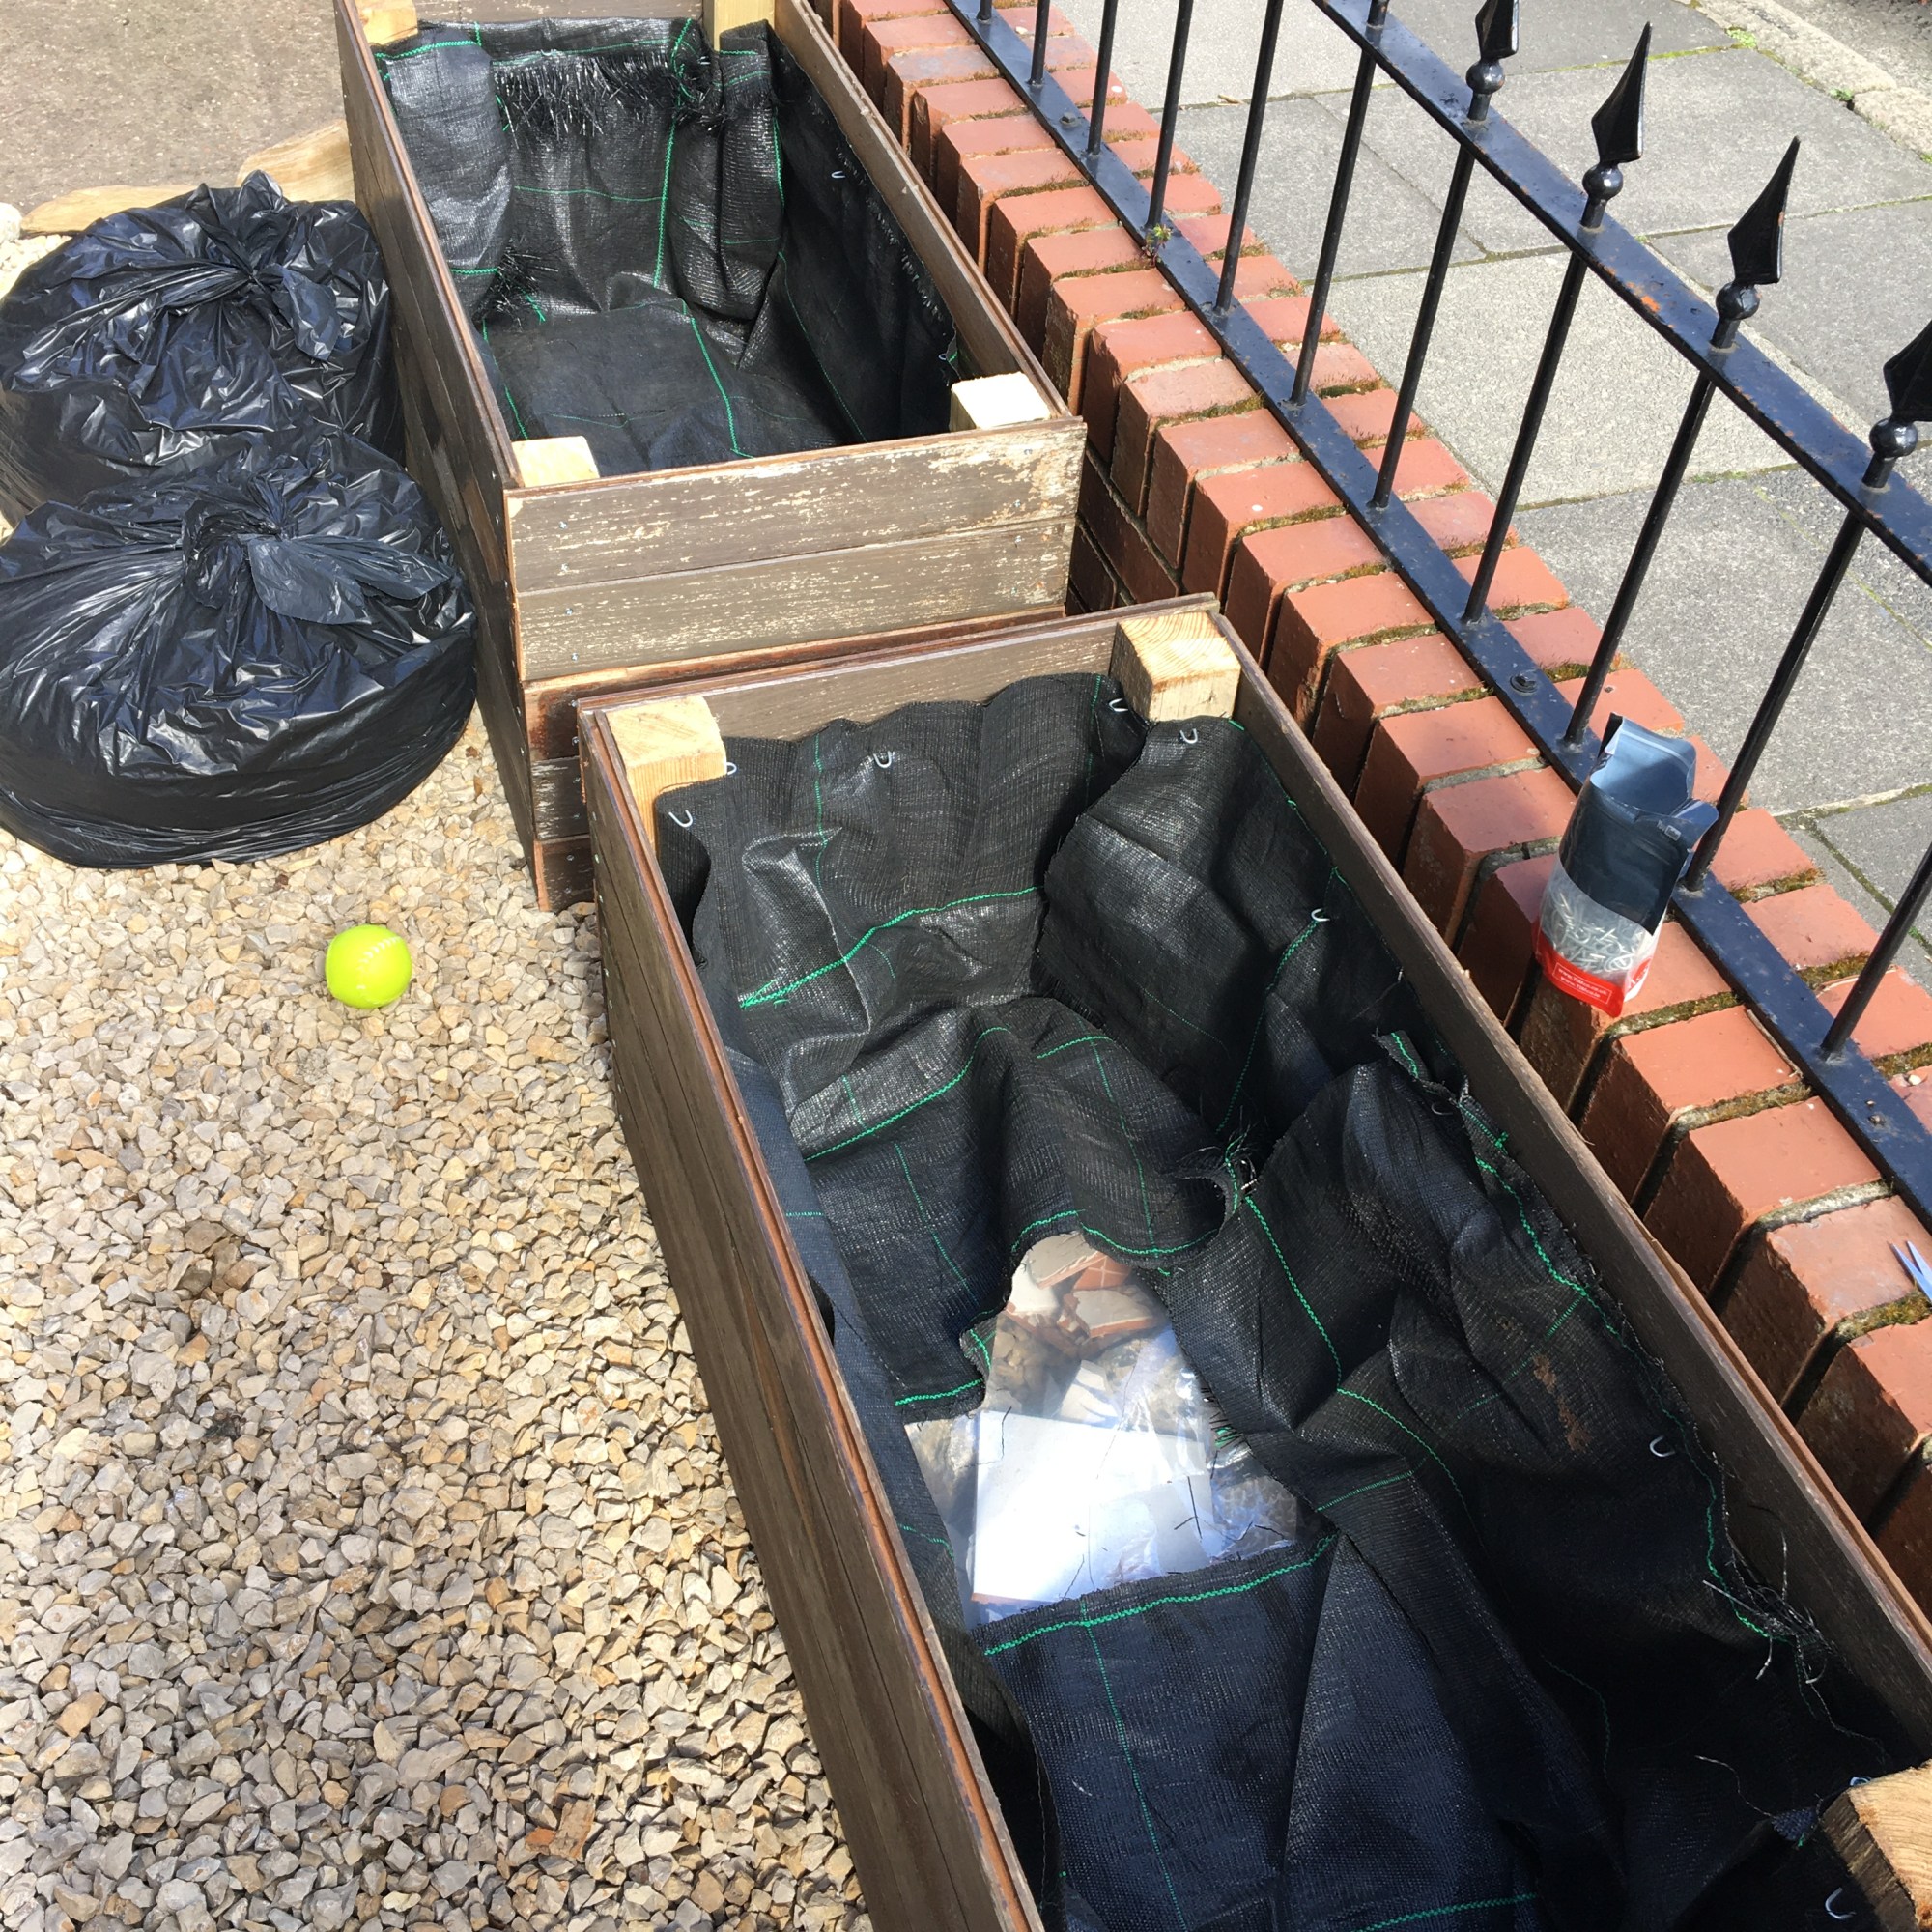
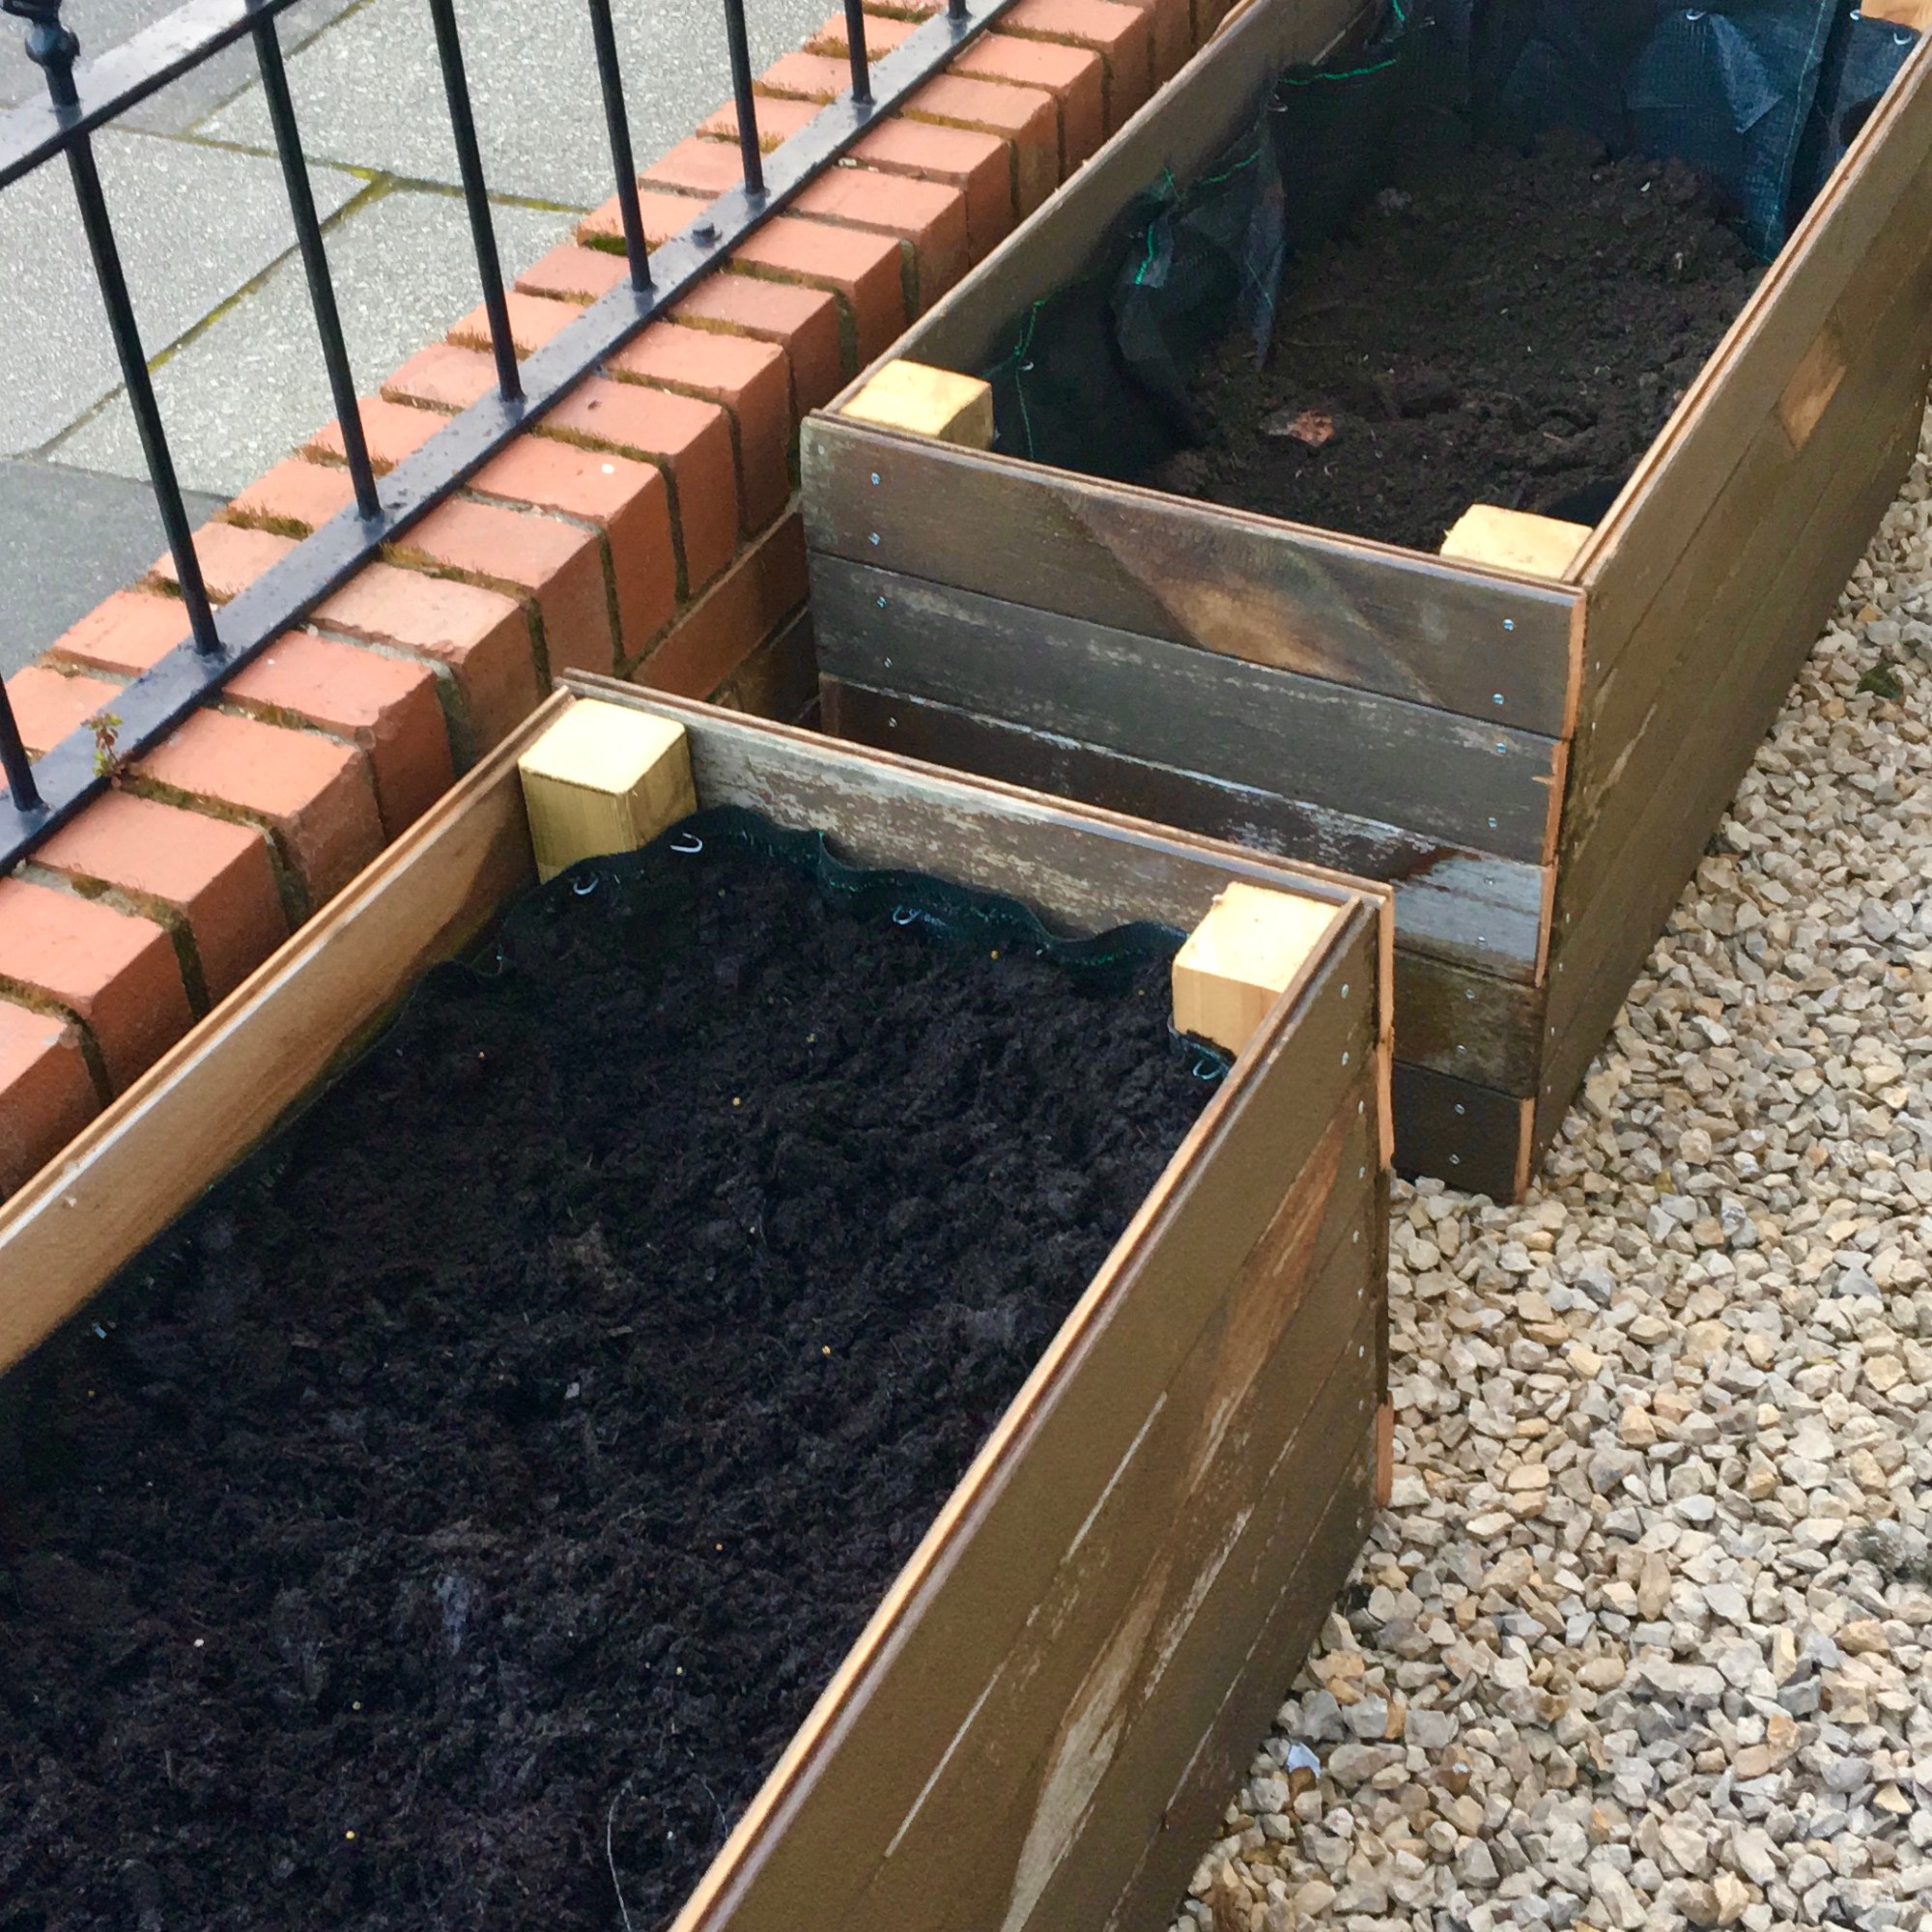
Once the beds were up and assembled, although standing on gravel already, I threw in some old rocks and broken crockery to allow for better drainage at the bottom. Once in, I lined them both with a weed membrane and stapled it in place.
I took to Facebook marketplace again (the place of dreams), and found a few people giving away free top soil. We loaded up a few old compost bags full and dumped that in the beds. Once approximately 1/3-1/2 full of top soil, we filled the rest with a mixture of bought peat-free compost and some composted horse manure (kindly donated by my parents to the cause). I gave it all a good mix up and then waited impatiently for spring to arrive!
How Much Can You Grow
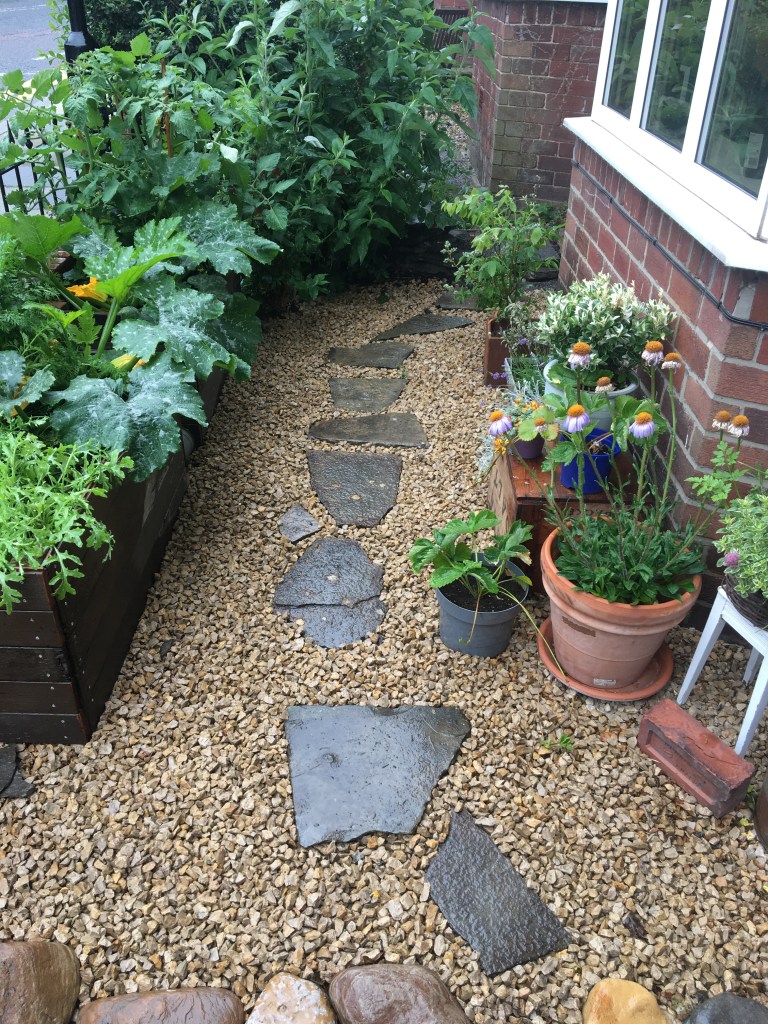
Being so size-tight, I wanted to cram in as much as I could and try a good variety of vegetables. In our total of 1m2 space, we managed to grow and get a good crop off of 3 courgette plants, 3 sun gold tomato plants, rainbow carrots and rocket! I also initially planted 2 chilli plants but the tomatoes quickly swamped them and they got shipped off into separate pots.
A Big Learning Curve
My bible for the summer was Grow All You Can in 3 Square Feet. It has some ingenious ideas for making the most of small spaces in urban garden settings and gives you lots of specific info about veg for seasons, sun/shade and harvesting.
I also started watching a lot of content from Epic Gardening on YouTube who, although is US based, shares every detail of gardening in raised beds – which as a complete beginner, I lapped up.
Conclusion
There is something so satisfying about creating something from nothing and we managed this project so quickly and cheaply, I really do think anybody could as well. My first season of growing veg was really exciting and I learnt a lot. If anything it was lovely to add some green to the street, and the neighbours loved seeing what was coming through as well as getting gifts of homegrown produce when we were over-run.
If anyone gives this or something similar a go, do let me know!
